
How to Dropkick in Half Punch
Earn the launch—spacing, stamina rules, and recovery so your kick is a finisher, not free food.
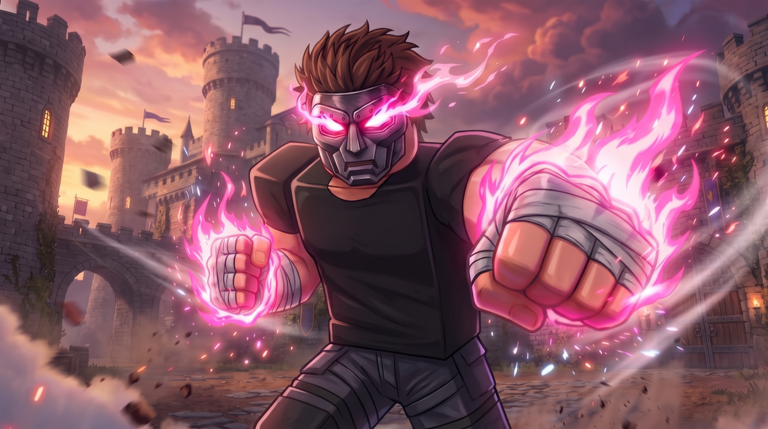
The dropkick is Half Punch’s signature highlight move: a committed foot launch that sends bodies tumbling through The Big G Studio’s physics arenas, fake blood flashing as ragdolls pile up. It is also one of the easiest ways to donate a free turn. This guide teaches when to dropkick, how to manage stamina and self-knockdown risk, how to space the entry, how to chain light foot pressure into a real kick, and how to lab everything against private-server bots.
If you still mash binds, read Controls first. If punches and stamina resets feel fuzzy, skim Combat Basics before specializing. Grab timing that punishes your whiffs is covered in How to Grab. Rank the tool honestly on the moves tier list—earned-range dropkicks sit near A; spam sits in C–D.
What a dropkick actually buys you
A clean dropkick can:
- Launch or ragdoll a low-stamina victim
- Break a stalemate when punches stall
- Scare hesitant players into backing off
- Create clip-worthy knockbacks that win lobby attention
A dirty dropkick can:
- Dump your stamina mid-air
- Leave you prone while someone grabs or punches you awake
- Telegraph so hard that spacers simply step offline
- Invite a third party while you admire the animation
Treat every attempt like a scarce resource, not a panic button.
When to dropkick (decision checklist)
Kick only when most of these are true:
- Range is earned — you stepped into realistic foot distance; you are not hoping the kick travels forever.
- Stamina is healthy — you can afford the commit and still stand after a miss.
- Opponent is committed or depleted — they whiffed a flurry, froze after a ragdoll, or are clearly empty.
- Camera sees the target — blind airborne kicks are D-tier habits.
- Exit plan exists — after land or whiff, you know whether to finish, grab, or leave before a third fighter arrives.
If two or more checks fail, throw a punch probe instead. Counter-punchers and grapplers farm impatient kickers—see fighting styles.
Stamina risk and the “fumes rule”
Dropkicks spike stamina cost compared with a single punch. Rules of thumb used by clean kickers:
- Never start a dropkick on fumes. Empty-bar hero kicks are free whiff-punish food.
- After a big miss, back off one body length and reset—forced reset is still a win.
- Cap public attempts: if you already whiffed two kicks this exchange, switch to punches or disengage.
- Bot drills should include a hard stop at roughly 30% stamina, matching the practice checklist.
Stamina is the real health bar in Half Punch. The kick that looks coolest on video is worthless if you cannot stand afterward.
Self-knockdown and recovery
Physics means you can punish yourself. After a whiff or awkward connect:
- Stop dumping leftover inputs into the air while ragdolled
- Track where opponents gather—especially the player you just missed
- Stand, reclaim camera, and only re-enter when space exists
- Do not celebrate a partial hit in the open; seven-player lobbies punish ego
Self-knockdown is feedback. Log whether the miss came from range, stamina, or telegraph, then fix that one variable in the next bot round.
Spacing: step in, then kick
The mid-article video shows how Half Punch physics feel when bodies collide; your job is to recreate the good collisions on purpose.
Spacing habits:
- Walk or strafe into range before the kick input—do not “hope-kick” from downtown
- Fight near the edge of piles, not the meatgrinder center, so your launch has room and you have an escape lane
- Circle so your camera keeps entry paths visible; third parties love kickers who stare at one victim
- After a successful launch, decide in under a second: finish, attempt a grab, or leave
Foot jab / light kick pressure (B-tier on the moves list) can check space without full dropkick commitment. Use those taps to measure distance, then cash the big kick only when the read is real.
Foot combos that set up the launch
You do not need a forty-move anime string. Useful patterns:
- Probe punch → step → dropkick when they freeze after eating the punch
- Foot check → pause → dropkick when they flinch from the check and lean in
- Whiff bait — show kick intent, cancel into movement, then punish their panic swing with a real kick or a grab
- Post-ragdoll first kick only if you arrived first and stamina allows; otherwise take the safer first punch
Alternate kick rounds with punch-only rounds in private servers so your hands do not rot into kick spam. Pure kick identity is easy to read; hybrid kickers who still speak punch language climb faster.
Private-server bot lab (recommended session)
Official experience text nudges players toward private servers for bots. Use that mode as a dropkick laboratory:
- Warm up movement and ten clean punches (Getting Started pace).
- Take ten intentional dropkicks only—count lands vs whiffs in a note on your phone.
- Repeat ten more with a mandatory entry step before every kick.
- Add five “kick then leave” reps so you practice not tunneling on the victim.
- Finish with five grab punishes on your own whiffs so you feel what opponents will do to you—link How to Grab.
Bring the same structure into the practice checklist. Re-run after any availability return noted on November 2026 updates.
Public lobby rules for kickers
- One focused habit per lobby (example: “only earned-range kicks”)
- No triple dropkick highlight attempts until your bot whiff rate improves
- If two fighters collide, wait—then kick the weaker wakeup, not both at once
- Ignore script curiosity; aura or infinite stamina shortcuts risk bans and malware—Scripts Hub
- Codes will not teach spacing—check Codes only for real gifts
Common failure modes
| Failure | Likely cause | Fix |
|---|---|---|
| Kick always misses | Range / camera | Entry-step drill; lower sensitivity |
| You fall more than they do | Stamina or bad angle | Fumes rule; lab recovery |
| Grabbed after every whiff | Telegraph spam | Fewer attempts; add punch probes |
| Third-partied mid-animation | Tunnel vision | Edge spacing; leave rule |
| Feels worse after downtime | Patch / status flip | Re-test via Updates |
Related pages
- Combat Basics — stamina and exchange model
- Controls — kick bind confirmation across devices
- How to Grab — what punishes your misses
- Mobile Controls — touch-specific kick discipline
- Moves tier list — honest ranking of earned vs spam kicks
- Fighting styles — kicker archetype deep dive
- Guides Hub — full learning map
Master the dropkick as a decision, not a personality. Half Punch lobbies reward the fighter who still has stamina—and a plan—when everyone else is airborne for the wrong reasons.
Frequently Asked Questions
Quick answers for Half Punch fighters.
How do you dropkick in Half Punch?
Use the kick/dropkick bind shown in your build (see Controls), step into realistic range, and commit only when stamina and camera are ready. Confirm the input in a private bot server before public spam.
Why do my Half Punch dropkicks keep failing?
Usually bad range, low stamina, or blind camera. Lab ten entry-step kicks against bots, count whiffs, and stop kicking on fumes.
Can a dropkick knock me down too?
Yes. Physics self-risk is real. After a whiff or awkward connect, stop mashing, recover stamina, and re-enter only when space exists.
Should beginners main dropkicks?
No. Learn disciplined punches and spacing first in Combat Basics, then add earned-range kicks. Spam dropkicks are easy to grab-punish.
Where should I practice dropkicks?
Use a private server with bots and the Practice Checklist. Track land/whiff rates, then take one habit into a public lobby.
Are dropkicks S-tier in Half Punch?
Earned-range dropkicks typically sit around A on the moves tier list. Blind or stamina-bankrupt spam falls to C–D.